Showing posts with label homemade. Show all posts

Friday, October 4, 2013

Vegetarianize Your Meal

This will be a quick post for Food Fun Friday. If you're trying to cut back on your meat consumption for whatever reason (you love animals, your health or the environment) you might want to know how to substitute tofu for ground beef or turkey in a recipe. Here's how...


Freeze one package of firm tofu. Open package, dump block into a colander in the sink. Use you hand to crumble the tofu into pieces. 


Heat two tablespoons of oil over medium heat. Add tofu crumbles. Sprinkle with 2 tablespoons of brewer's yeast. Stir until heated through.


Use in any recipe as you would ground meat. Like in Chili.


Friday, August 31, 2012

Heart Friendship Bracelet

Maggie's Mind Mumbles//: Heart Pattern Friendship Bracelet


When I was an adorable, little, red-headed girl, with fat cheeks, and freckles in numbers rivaling stars in the sky (okay I still look like that ;) ) I was a Girl Scout. I went to Girl Scout day camp and Girl Scout overnight camp and Girl Scout meetings (and I sold Girl Scout cookies!). While I learned many the great things they teach you in Girl Scouts, one thing I will probably never be able to forget is how to make friendship bracelets. That muscle memory stuff is great isn’t it, especially considering friendship bracelets are now sold in store (what?) for $15 (what?!).

So, since we all know just how much I love making things myself I will go through the mantra again:
  1. you get to choose your own preference…
  2. you spend less money… and
  3. you form a deeper connection with the things you own because you crafted it with your own two hands.

This tutorial walks you through the steps of making a friendship bracelet with a heart pattern. Enjoy!

To start you need to cut your strings. Pick two colors. Hold your arms straight out perpendicular to your body, from fingertip to fingertip is how long your string should be. Cut four strands, two for each color. Fold the string in half take the fold and make a knot close to the end. This loop will be used to clasp the bracelet, so make it small but big enough that a knot can go through.


embroidery floss, heart pattern, friendship bracelet

Tape your strings down to a flat surface (or if your old school  safety pin then to your jeans), so that it is tightly secured. Order your strings the same as in the image above. Whichever color is on the outside will be the color of your hearts. Number the position of the strings from left to right 1-8.

Now, I would like to explain the knot… There is the going left knot and the going right knot.

*Tip: The illustrations below show on top both knots going forward and below that one knot going forward and one going backward. I noticed that two of my heart strings got more use than the other two. When you are knotting one pink around another, you can switch the dominant strings using the bottom illustration knot.


embroidery floss, heart pattern, friendship bracelet

To go right take the string in the number one position, lay it over the second string take it back under the second string and pull it through the loop.


embroidery floss, heart pattern, friendship bracelet

Going left is the same process as going right; only you wrap the eighth string around the seventh string in the opposite direction.

Each time you make a knot you will do this knot twice.


embroidery floss, heart pattern, friendship bracelet

  1. Like I said you will have your string laid out in the order shown.

  2. Take string 1 and knot it twice around string 2 then string 3 and finally 4. Then, take string 8 and knot it around string 7, string 6 and finally string 5. Finally knot the middle strings together (going left or right, it doesn’t matter)

  3. Follow the same steps as above for the next row with the second color.

  4. Now take the second string and knot it going left around the first string and the seventh string going right around the eighth.

  5. Fill in the space by taking the second string and knotting it (going right) around strings 3 and 4 and the seventh string (going left) around strings 6 and 5.

  6. Now again take the second string and knot it going left around the first string and the seventh string going right around the eighth.

  7. Fill in the space again by taking the second string and knotting it (going right) around strings 3 and 4 and the seventh string (going left) around strings 6 and 5.

  8. Knot string 1 and 2-4 (going right) and string 8 around 7-5 (going left). This is step 1 again completing the heart.

  9. Repeat step 2-8 until the bracelet is the length you like (I usually do about 52 rows).

Now that you know the basic you can do many patterns. Try one on the friendship bracelet website.


"Make new Friends but keep the old, one is silver and the other's gold. A circle's round, it has no end. That's how long I want to be your friend."

Wednesday, August 22, 2012

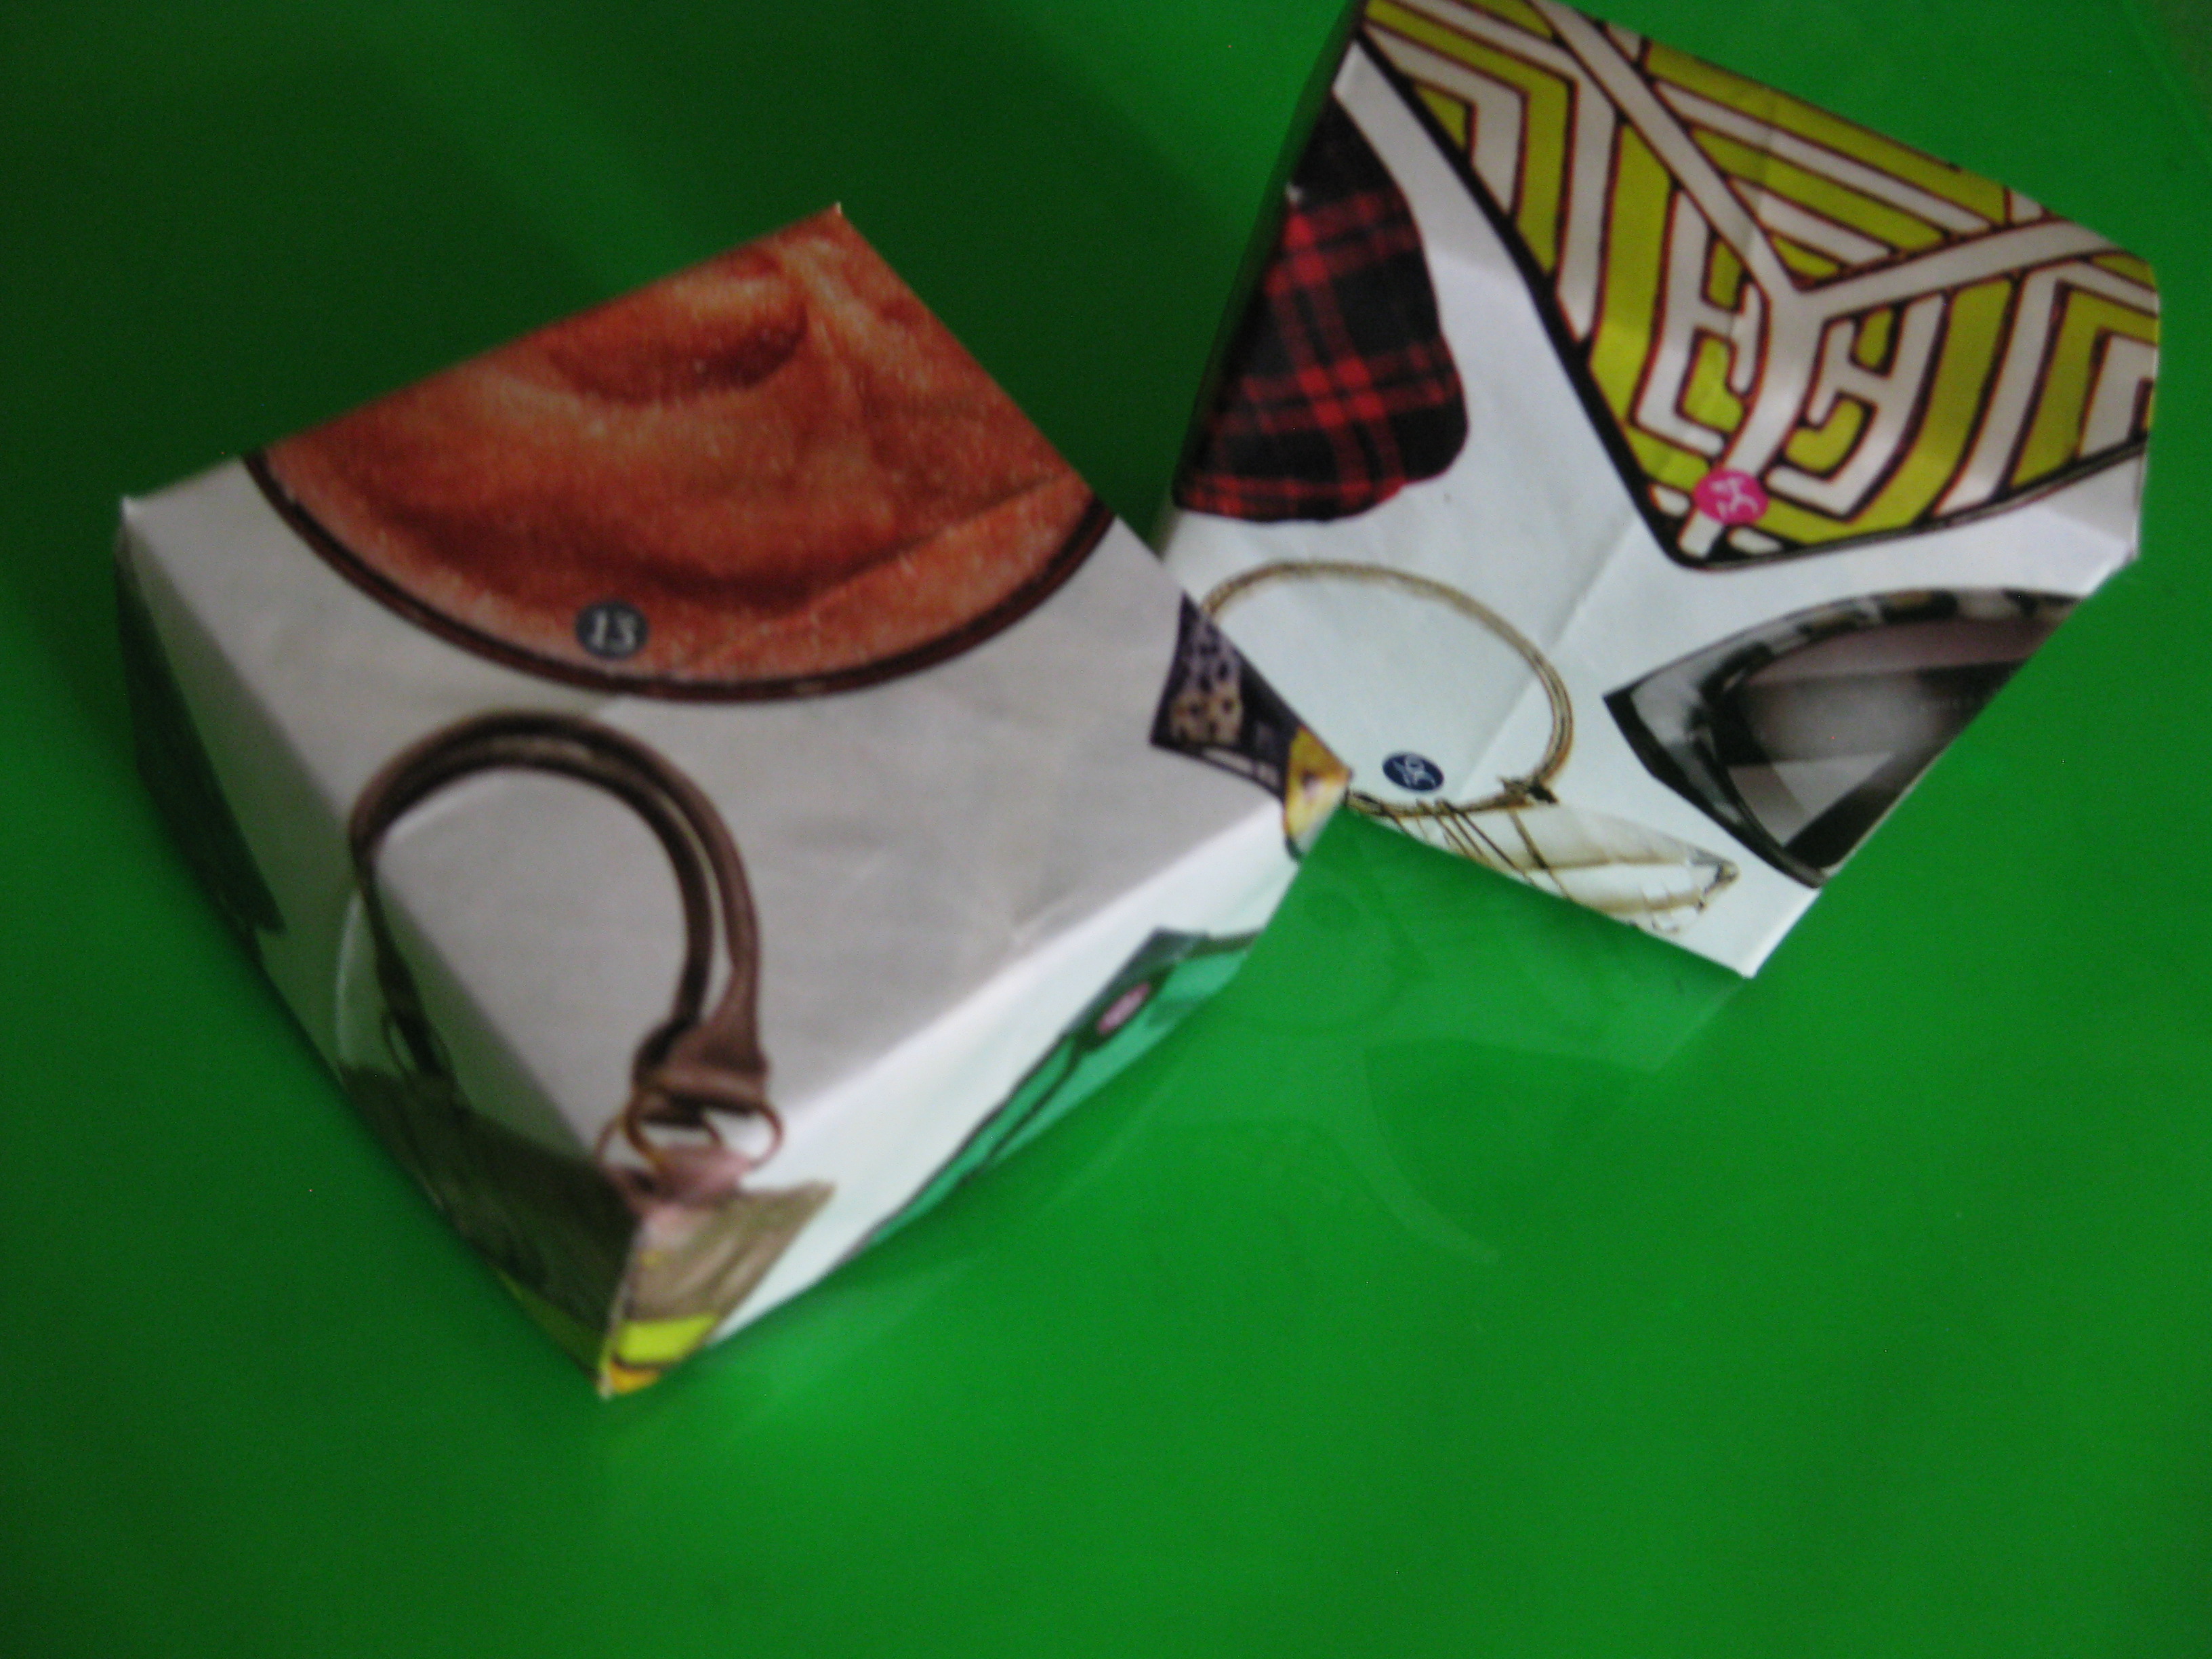
Origami Gift Box


Origami box, paper, gift box, recycled magazine


We all know that giftwrap can be expensive. I don’t want to spend as much (or more) on the paper, bag, and bow as I did on what’s inside. In the past I have been known to make the wrapping as much a part of the gift as what’s inside by using a purse, basket or tote bag. I also like to “be green,” so to speak and recycle old newspaper and magazines as wrapping paper. This is a tutorial on making gift boxes from magazine pages.


Origami box, paper, gift box, recycled magazine

What you’ll need:
  • Scissors
  • Paper
  • Ruler
  • Glue-stick (optional)


Origami box, paper, gift box, recycled magazine

  1. Find some paper with a pretty design. The paper must be a perfect square, cut off extra length to make it a square. I used a magazine page (doubled up with a second page glued to the back for sturdiness). Pay attention to what is at the center of the square when cutting, this will be the top of the box.

  2. Place the pretty side face down. Fold the square on the diagonal in half, both ways.

  3. With the pretty side down fold each corner into the center to make a small square.

  4. Unfold two opposite corners. Taking the edges that are still folded down, fold again lining the edge up with the tip of the corner. Do this for the opposite side. Then fold down the other two corners and repeat.

  5. Unfold all folds. Find the creases of the small square at the very center of your paper. Lightly draw the outline on the not pretty side of your paper to make sure you don’t over cut in the next step.

  6. Cut in from the edge of the paper along the creases as shown in image 6 above. Don’t over cut.

  7. Fold along all crease on the sides with tabs (triangles) as shown.

  8. Fold the final two edges over the tabs and press down to “stick.”

  9. True origami doesn’t need glue but since this is a gift I didn’t want the sides to pop up so I glue down the corners. You can also cut out a small square of pretty paper that fits in the box and glue that over the corners. You can see that I did that in the image below.


Origami box, paper, gift box, recycled magazine

If you want to make a box with a lid the lid paper needs to be slightly larger than the bottom. My box is about 2 1/4” when completed. The bottom was 6” and the top was 6 1/4”. If you want a bigger box (about 4 1/4") use 12” for the top and 11 1/2” for the bottom; for a smaller box (about 1 3/4") use 5” for the top and 4 13/16” for the bottom.

If you forget how to do proportions here is a link to a calculator.

Plug in 2.25 (the size of my completed box) on the top of the fraction to the left and 6 (the size of the bottom paper) on the bottom of the fraction on the left.

Plug in the size you want your box to be on the top of the fraction on the left. The equation will return the size you should cut your bottom piece.

Then plug in 6 and 6.25 on the fraction on the left and whatever number you got back from the previous step. Now the equation will tell you how big to cut the top piece.

Or you could just guess... testing on scratch paper never hurt anyone.

Origami box, paper, gift box, recycled magazine


Monday, July 16, 2012

Small Space Gardening on a Budget

My Grandpa bought me a book called In a Japanese Garden by Charmaine Aserappa with original woodcuts by Akiko Maomura for my birthday. It is full of short phrases about each component of a Japanese garden and a corresponding image (woodcut).  At the end there is a description of Japanese gardens and what they mean, “not merely decorative, but meticulously designed and maintained as meditative spaces for contemplation, refreshment and reflection.” I hope I can find both refreshment and order in my garden space.

Maggie's Mind Mumbles//: Small Space Gardening on a Budget


If you’ve read my other posts you may know that this summer my biggest project has been my balcony garden. It all began with the Hanging Gutter Garden Part 1 and Part 2. While the gutter garden was certainly the most intensive of my projects this summer, it was not the only one.  You may remember this flower tower mentioned in this post; let me tell you how I made my version.


Maggie's Mind Mumbles//: Small Space Gardening on a Budget My Version

Materials:
  • Decreasing sizes of pots – you can use any number of pots I used four (they should have holes in the bottom).  I got the three terra cotta pots from Michael’s for fairly cheap (sale + coupons) and the big plastic pot from WalMart for about $7 bucks and I didn’t need to buy a water collection dish because it has it’s own draining mechanism built it.
  • Long metal rod – I used one of those threaded rods they have at Home Depot. I will be the first to admit that I have no idea what it’s actually for but it was cheaper than buying rebar (and I didn’t have to cut it).
  • Plants – I lucked out because the King Soopers had a big sale on flowers (10 4-packs for $10) I also bought the potato vines for about $2.50 because I love the way they look. Any annuals will do, you could even plant edible plants or herbs.
  • Soil – I used some with water beads since it’s been so dry, but any kind will do.

You start by filling the base pot half-full with soil. Stick the rod in the center, slide the next pot down the rod.  Fill that pot halfway with soil and repeat the process with the remaining pots. If the rod sticks out the top, simply add more soil between pots. Then plant your flowers or what have you as you normally would. Simple right?


Maggie's Mind Mumbles//: Small Space Gardening on a Budget “Be the bud. Prepare to blossom.”

The remaining flowers are planted in flowerpots around the railings.


Maggie's Mind Mumbles//: Small Space Gardening on a Budget


Maggie's Mind Mumbles//: Small Space Gardening on a Budget “Be the gardener. Create order.”

I also mentioned that I wanted to plant tomatoes and peppers in pots. I used water walls to increase their growing season. Here are my results.


Maggie's Mind Mumbles//: Small Space Gardening on a Budget I used fallen branches as support (free vs. not free... I choose free)
Maggie's Mind Mumbles//: Small Space Gardening on a BudgetThis is the third ripe tomato so far.

Maggie's Mind Mumbles//: Small Space Gardening on a Budget


Maggie's Mind Mumbles//: Small Space Gardening on a Budget My First Pepper

My strawberry plant is in a hanging basket. It’s been doing well, only the birds keep getting the fruit before I do. I would mind more if they weren’t so dang cute and didn’t sing such pretty songs to me while I drink my tea in the morning.


Maggie's Mind Mumbles//: Small Space Gardening on a Budget

I also ended up planting peas from seed using this tutorial. They started out growing like mad; I harvested two bowls of peas in their peak. However, it turns out container gardening is quite difficult.  I think I over-watered them causing their roots to run out of oxygen and rot, finally they started dying off. I’m too embarrassed to share the picture. On the bright side there is some re-growth now that the soil has dried out a bit.

The final addition to my farm was sort of last minute. I had an extra pot and some carrot seeds so I planted them in the pot. I've never heard of this being done and this is crazy (but here's my number, so call me maybe). Anyway we'll see how it turns out; all I have at the moment is greens. I did a thinning last week so hopefully the carrots start being carrots.


Maggie's Mind Mumbles//: Small Space Gardening on a Budget My watering can is in the front (isn't it cute?). The carrots are in the terra cotta pot just behind the watering can.

As for this project, I couldn’t figure out a way to stabilize it. I think the best way would be to drive the rebar deep into the ground.  Well I don’t have ground, I have concrete and a wooden railing.  I scratched that project but my grandmother found these cute colorful pots at the dollar store.  She bought a bunch and I am using them for herbs (I realize now this is better because I can bring them inside this winter). P.S. Notice the tomato on the window sill through the window. :)


Maggie's Mind Mumbles//: Small Space Gardening on a Budget 


From left to right: dill, cilantro (used to be cilantro), spearmint, lemon balm, oregano, basil, spring onions
They sit on my air conditioner

“Be the seasons. Welcome change.”
Maggie's Mind Mumbles//: Small Space Gardening on a BudgetRosemary Bush
I wanted a way to enjoy my space so I have been keeping my eyes open for a small-ish patio set.  This bistro set caught my eye at Home Depot. At that point I told my parents about it and guess what I got for my birthday? Well see for yourself.


Maggie's Mind Mumbles//: Small Space Gardening on a Budget
It didn’t come with the cushions, those were a separate gift from my grandparents.

You can see the grill in the background; Reid has wanted a grill since, as long as I’ve known him (and we just celebrated our 3 year anniversary last week). We found this charcoal grill at a flea market in south (SOUTH) Fort Collins for $12.  One night he was grilling as the sun was setting and it started getting too dark for him to see. He used his camping headlamp that night but the next day he went out and got a strand of lights to hang from the ceiling. Now it feels like an outdoor café.

“Be the moth. Seek the light.
Be the lantern. Guide the lost.”

We also found two wind chimes (and I made a third)


Maggie's Mind Mumbles//: Small Space Gardening on a Budget


Maggie's Mind Mumbles//: Small Space Gardening on a Budget “Be the wind chime. Let the breeze blow through you. Turn the storms into song.”

Now that all the hard work is done I have had the chance to relax in and enjoy the space. We eat dinner at our café, I read books in the morning with my breakfast and tea, and I tend and water the plants (the best part of container gardening is that there are no weeds, only insect pests). Though it took most of my savings to set it up I have no regrets about the rewarding outcome. My first real experience with gardening has overall been successful, maybe not bountiful, but successful none-the-less.

Leave a comment; I need all the advice I can get. What are your best gardening tips?

Wednesday, July 11, 2012

Hanging Gutter Garden Part 2: Putting it Together

I know it has been over 3 months since Hanging Gutter Garden Part 1: Adventures in Home Depot. But I do have excuses. One excuse is that I lost my camera battery charger and I could not take pictures of my progress, another is that I’m lazy. But, just before the backpacking extravaganza (and after losing Reid’s camera in the Canyonlands) I broke down and purchased a new (expensive) charger (with LED charging screen and European outlet adapter).

Now that I have the means to take picture I figured it was about time to share my patio garden with you lovely people.

Maggie's Mind Mumbles//: Hanging Gutter Garden

As I said in this post, I wanted to create the hanging gutter garden like this one.

For mine I didn’t have the fancy pants hardware (or the fancy pants bank account). I used the gutter given to me by the gutter guys (A story told here). I also purchased a plastic gutter for $5 at Resource 2000, where they sell salvaged construction materials.


Maggie's Mind Mumbles//: Hanging Gutter Garden The finished product – metal gutter


Maggie's Mind Mumbles//: Hanging Gutter Garden Bottom Level = Lettuce


Maggie's Mind Mumbles//: Hanging Gutter Garden Middle Level = Radishes (recently harvested and replanted)


Maggie's Mind Mumbles//: Hanging Gutter Garden Top Level = Spinach (recently replanted due to struggling first crop)


Maggie's Mind Mumbles//: Hanging Gutter Garden The finished product – plastic gutter


Maggie's Mind Mumbles//: Hanging Gutter Garden All Levels = salad mix (sprouting)

The materials:
  • 1 gutter cut into three equal parts (process is almost identical no matter the material, I tried with both plastic and metal gutters)
  • 6 gutter caps – the plastic ones are quite nice and can be purchased at Home Depot, Metal are also nice but mine had to be bent to fit the gutter, which was quite a process.
  • 2 hooks – I chose some that screw into a drilled hole
  • 16’ of 1/8” steel cable cut into 6 equal lengths (or as much as you’ll need to fill your space, gutters should be at least 18” apart to allow adequate sun exposure and plant growth) – I bought this kit at walmart because I was there buying pots and it was the only cable they had. The kit actually came in handy as the clips (though not exactly what I was looking for) worked perfectly. As I worked I realized I needed 32” of cable for both my gutter gardens so I ended up having to go to Home Depot for a yard of steel cable.
  • 12 clips – 6 came in the kit mentioned above and there was another pack nearby without 3 clips (no cable) so I bought two of these packs.
  • 2 thimbles – these came in the kit mentioned above but they are also sold alone


Maggie's Mind Mumbles//: Hanging Gutter Garden
Above = clips, Below = thimble,
  • Wire Cutters – sharpened
  • Electric drill – with attachments for drilling holes large enough for the steel wire to go through and for tightening nuts on the clips
Step 1. Cut the gutters
The gutter man who gave it to me cut the metal gutter in uneven thirds; my dad then cut into equal length pieces. I sawed the plastic gutter into (almost) equal thirds (I did it all by myself thank you).

Step 2. Drill holes
My dad helped me drill two holes, large enough for the steel cable to fit through, across from each other on each end, and one hole at the center of the base on each end (6 holes per gutter section).

Step 3. Fit the end caps
This part was quite complicated for the metal gutter. The plastic gutter was simple, the caps fit perfectly. My Metal Gutter was not the exact shape of the cap. My dad used pliers to shape the end of the gutter to fit into the cap and a rubber mallet to force it in where it wasn’t exactly perfect. He did this for each of the 6 end caps and I am so grateful for that. If you buy your gutter where you buy your end cap this shouldn’t be a problem for you, mine came from different sources.

Step 4. Cut steel cable into 6 36” sections
We definitely over estimated the amount of steel cable to use. My dad and I were not at my apartment during the building process so we wanted to give ourselves some extra. You might not need so much extra slack when building your gutter garden. Be careful when cutting the wire, it tend to fray; very sharp wire cutters can help prevent fraying.

Step 5. Thread the steel cable
With one end shorter than the other thread the cable through the two holes at the top of the gutter. This can be quite difficult if the cable has frayed. Also be prepared to be poked with sharp metal; gloves are probably a good idea at this point.

Step 6. Secure the cable
Loosen the nuts on the clip and thread both ends of the cable through the clip. Pull the clip down on the cable where its not pulling to much but is tight. Finagle the cable so the short end only pokes out of the clip about an inch and tighten the nuts on the clip, a little on each nut so it tightens evenly. Repeat this process (step 5 and 6) for each gutter on each end (a total of 6 times)


Maggie's Mind Mumbles//: Hanging Gutter Garden
The Metal Gutter


Maggie's Mind Mumbles//: Hanging Gutter Garden
The Plastic Gutter

Step 7. Connect the pieces
Starting with the gutter section you want at the base of your garden thread the long end of the cable through the hole in the base of the middle gutter section. Attach a clip around this single end of cable and tighten. Make sure the clip is at the length you want. Do this on both ends, keeping the gutter level. Do the same thing with the middle gutter and the top gutter. Leave the top gutter for now.


Maggie's Mind Mumbles//: Hanging Gutter Garden The Metal Gutter


Maggie's Mind Mumbles//: Hanging Gutter Garden The Plastic Gutter

Step 8. Hanging the dang thing
This was another complicated step. The whole contraption is very heavy, awkward and dynamic. This stage was obviously done at my apartment with my boyfriends help to replace my dad. There is most definitely a better way than how we did this but I am the queen of doing things in the most complicated way. We measured the distance between cables, drilled holes for the screw hook and screwed them in. Then we hauled the apparatus up a step stool and one of our kitchen chairs between the two of us. I stabilized my end as he threaded a clip onto the cable then a thimble around the hook and tightened it. We kept the thing slightly above the railing so that when we screwed it down it would be tight. Mind you this took many, many, many, many, MANY tries because there were so many pieces to hold steady at a precise place, but we finally got it and 3 months later it looks fantastic.

Side note: The method above details how we hung the metal gutters. For the plastic gutters we screwed the bottom gutter onto the railing first, but we couldn’t get it tight enough at the top and it looks like it’s leaning forward since the hooks at the top and the screws at the base are not directly vertical. Therefore we developed the method above, which was also difficult but returned better results.


Maggie's Mind Mumbles//: Hanging Gutter Garden 
The Hook in the Ceiling

These gutters dry out VERY fast, especially in an arid climate like Colorado. I have struggled with wilting, browning, and flat out dying plants in these gutters since planting. I have discovered that on hot days I must water them twice: once in the morning and once in the evening, in order to keep them healthy. Someone in a more humid environment might not experience these problems.


How did you like this post? Are you interested in making a gutter garden? Do you have questions about my process? Leave a comment.